Small Achievable Steps To Success
When I first learnt how to make a mallet, I no idea what to do or how to do it – this changed when I undertook my Forest School training. One of the best things I learnt during the initial training week was the process of taking small achievable steps to achieve a bigger goal. If we only focus on the big hairy goal, then we often become overwhelmed. This can lead to paralysis at best, or at worst, failure. As we learnt about how to used each tool, another piece of the puzzle fitted into place, moving towards the next step.

Mallet Step 1 – Choosing Wood
First of all, choose the correct length of wood. This is the starting point. Too big and it becomes unwieldy. Too small and there’ll be nothing to hold on to. It’s not a perfect science, but making a decision is the starting point. I also needed to consider the thickness of the wood. this is important for when you start cutting into the branch. On this occasion, I used a piece of sycamore sourced from my local school. It had been cut to prevent further damage to a neighbouring property. The longer section of branch has yielded lots of material for other projects already.

Mallet Step 2 – The First Cut Isn’t Always The Deepest, It’s Just Right
Now that we have chosen wood, the next step is to use our bowsaw to make a cut. Our sawing hand is uncovered and we have a glove on our helper hand. The cut needs to be around the midpoint [maybe even a little back from it]. We cut in until the top of the blade disappears. We then continue to rotate the branch, each time cutting in to the depth of the bowsaw blade. Once we’ve completed this, we put our bowsaw aside.

Mallet Step 3 – Crafting The Handle
At this point we find a solid surface to work on and turn the branch 90 degrees. We need to make sure that the side facing up will be our handle. We now set our billhook to work. Not heard of a billhook? Find out more here. Our billhook is going to help us split of sections of our wood in a rough square pattern to fashion the handle. Holding the billhook handle in one hand, we use another log or mallet to strike the blow. The initial cut we made with the bowsaw acts like a stop cut. A stop cut ensures the billhook doesn’t keep passing through the branch and taking off more material than needed. We repeat taking one side at a time until enough material has been removed.
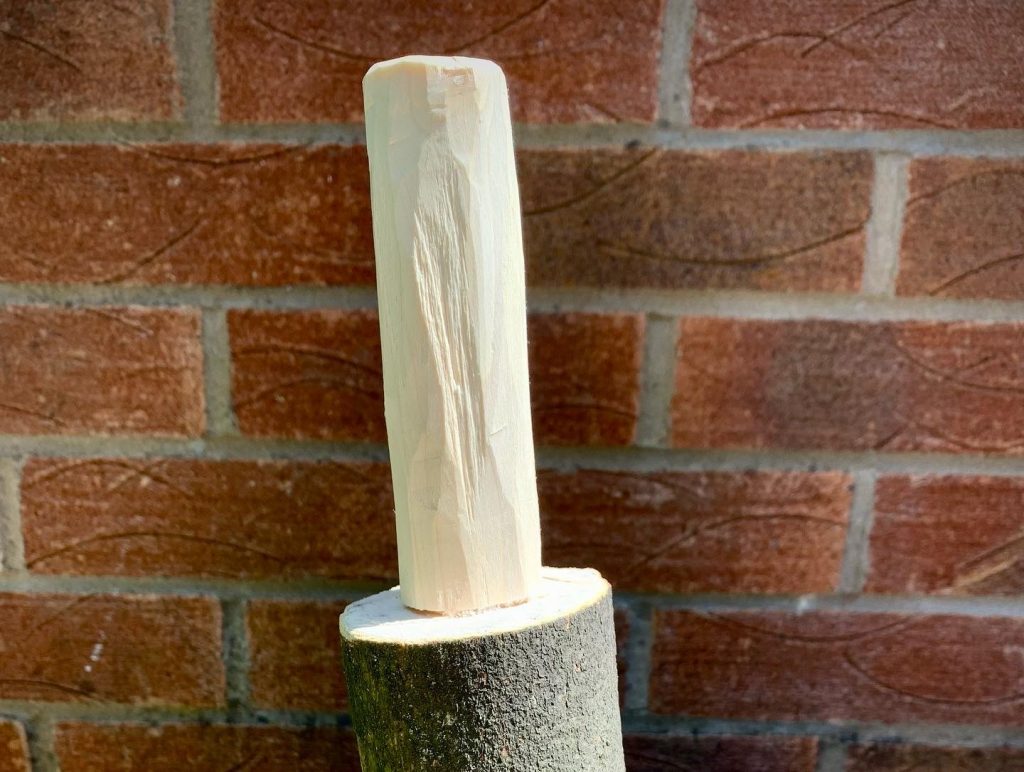
Mallet Step 4- Refining The Handle
Once I am happy with the removed material, I switch over the to the sheath knife. The small sharp blade of the knife allows for a more surgical approach. Again, the stop cut on the underside of the main body ensures the knife goes no further than required. Working with the sheath knife rounds the sharp rough edges produced by the billhook into a smooth comfortable working handle. If required, a small amount of sanding can be done to remove any remaining splinters. It should also be noted that the bark will come off once the mallet comes into use. This outer layer can be removed with the sheath knife if desired. Alternatively, the bark will come away with use.

Tools Of The Trade
Sharp, powerful tools are used to help fashion the mallet. The bowsaw, a favoured Forest School tool, makes short work of green wood, providing you have the offset teeth. I use a 24 inch blade. If working with learners, a two-person approach to tool use should be used. This provides maximum safety and output.
Secondly, the billhook. Historically used as a coppicing tool, billhooks are used for splitting and cutting wood, both for crafting and fire uses. Within the UK, there are many regional variations of the billhook, but I prefer to use the Devon pattern with a broad hooked blade and razor sharp cutting edge. Forged billhooks can be up to 100 years old and are much preferable to more modern variations. With some TLC and effort, a reconditioned billhook can serve many decades to come.
Finally, the sheath knife. There are many fine knives that can be used in a Forest School setting. My personal bushcraft knife is a Casstrom Lars Falt knife. For learners, I tend to use the Mora Companion knife. Both are fixed blade knives that have their own merits, price points and uses. Whichever sheath knife you choose, ensure that it will do the jobs you need it to do within the Forest School setting.
Having good tools, a solid plan and working in small steps lays the foundation for success. This may take several sessions to achieve with learners. Working on skills one step at a time is ok. We don’t need results yesterday, but we do need to keep trying and moving forward.
Have you made a mallet? If so, how did it work out for you? If you’d like to know more or learn how to make a mallet, then please contact me.